I just wanted to share a quick and dirty visualization I made to analyze some an processing pipeline I’m working on.
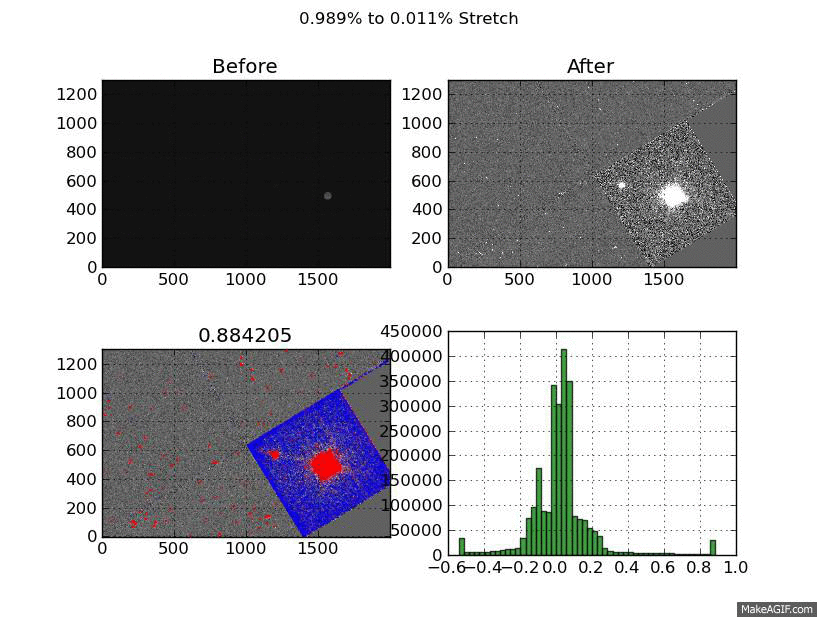
What you are looking at is a GIF of a the same image displayed with a linear stretch from 11 stretch cut-offs. The cutoffs are created by flattening the top and bottom pixels. It’s a little quick and dirty but I’ve noticed it works across a broad range of image types.
However, the top % of pixels will often include data from the target. This is good strategy when the target is saturated since you aren’t losing any information by scaling it down. But when the target is not saturated you end up “smoothing” out real features.
To test this I tried varying the %-clip levels. For each image I made 11 png files. Each of these pgn files is a XX% to YY% stretch. They start at 99% to 1% and step down by a 1/10 of a percent to 99.9% and 0.1%.
Each of these png files contains 4 images. The first is the before image, then the after image. The 3rd image is the most interesting, it shows the top pixels which were flattened in red, and the bottom in blue. The last image is the histogram of the after image. The title shows the stretch range and the title of the “flagged” image shows the value of the top % cut-off.
The “flagged” is definitely the most interesting - it shows the compromises you make to create a acceptable linear scaling. Still thinking about how to improve the end product but I’m happy with the visualization I created to get there.